How I Built a Static Website in 8 Hours with Claude Code

A case study in AI-assisted web development using free tools
In this article:
- How Much Does It Cost to Build a Static Website with AI?
- How Do I Build a Static Website with Claude Code?
- How Do I Avoid Mistakes When Using AI to Code?
- Should I Use WordPress or Static HTML for a Small Website?
- What Free Tools Should I Use to Build a Professional Static Site?
- What Are Claude Code's Best Features for Web Development?
- How Do I Set Up a CLAUDE.md File for My Project?
How Much Does It Cost to Build a Static Website with AI?
My wife needed a promotional website for her jazz concert series - five shows across Hamburg in 2026. The requirements: bilingual German/English, mobile-first design, SEO-optimized, and a 1930s Art Deco aesthetic. I've built websites for over a decade (mostly WordPress), but this time I wanted to see how far AI-assisted development could go.
Total time: 8 hours from concept to live site.
Live site: celebrate-gershwin.netlify.app
Tools I Used
| Tool | Purpose | Cost |
|---|---|---|
| Claude Code | AI coding assistant in VS Code | $20-100/month |
| Google AI (Nano Banana Pro) | Image generation for mockups | $20-100/month |
| Canva | Asset cleanup and preparation | subscription |
| GitHub + Netlify | Hosting and deployment | free |
| Google Fonts | Typography | free |
| Tailwind CSS | Styling via CDN | free |
Subscription Notes
- Claude Code Pro ($20/month): Works well but has token limits that reset several times per day. You may need breaks during intensive sessions.
- Claude Code Max ($100/month): No token limits. This is what I used.
- Google AI Pro ($20/month): Access to Google AI Studio. Generate one image at a time.
- Google AI Ultra ($100/month): Access to Google Flow for batch image generation. Much faster for iterating.
I already had these subscriptions for other projects. Net new cost for this website: $0.
What I Built
- Bilingual DE/EN with toggle
- Mobile-first responsive design
- 5 MusicEvent structured data schemas
- UTM tracking for analytics
- Newsletter integration
How Do I Build a Static Website with Claude Code?
Here's the 5-step process I followed:
Step 1: Design Mockups
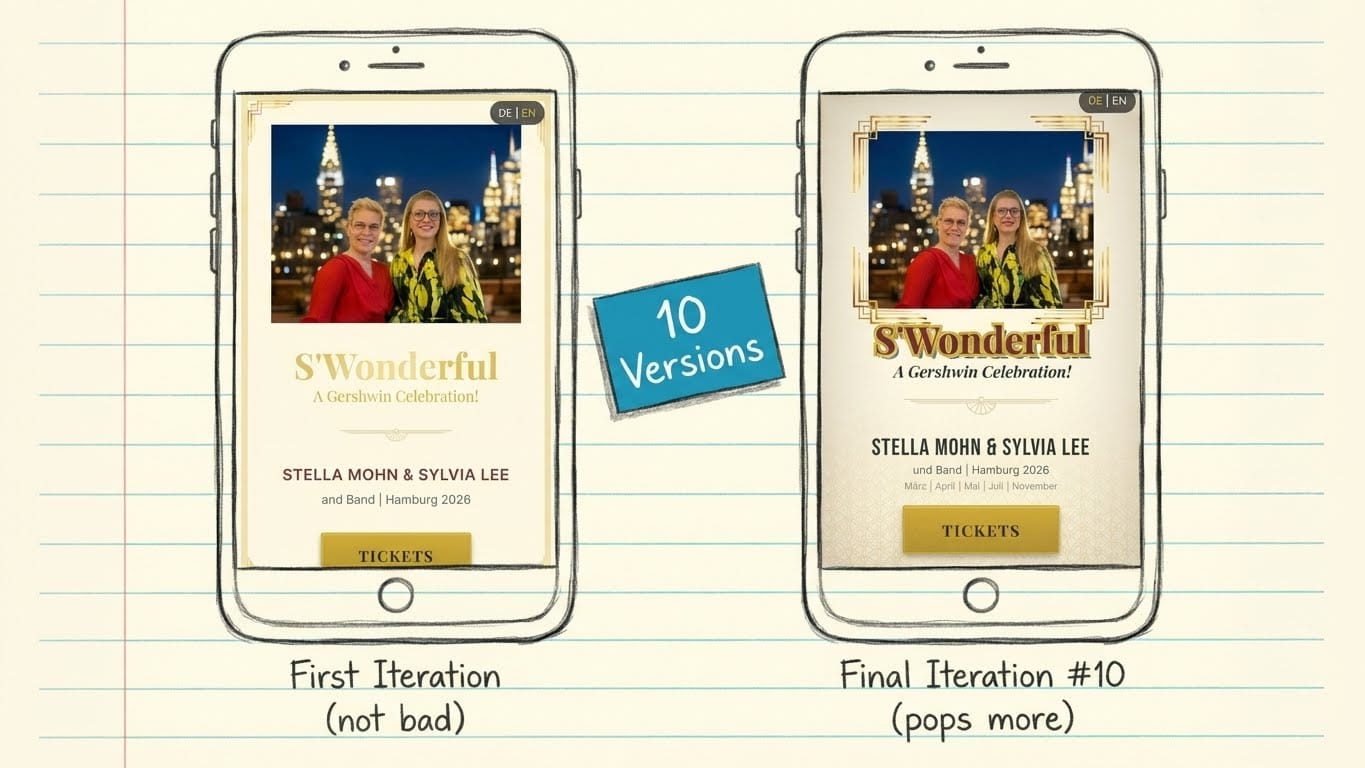
I started with AI-generated mockups in 9:16 portrait format (mobile-first). Using Nano Banana Pro, I described the aesthetic: "1930s Broadway playbill, Art Deco, gold and burgundy color scheme, elegant serif typography."
After roughly 10 iterations over 30-60 minutes, I had a visual direction.
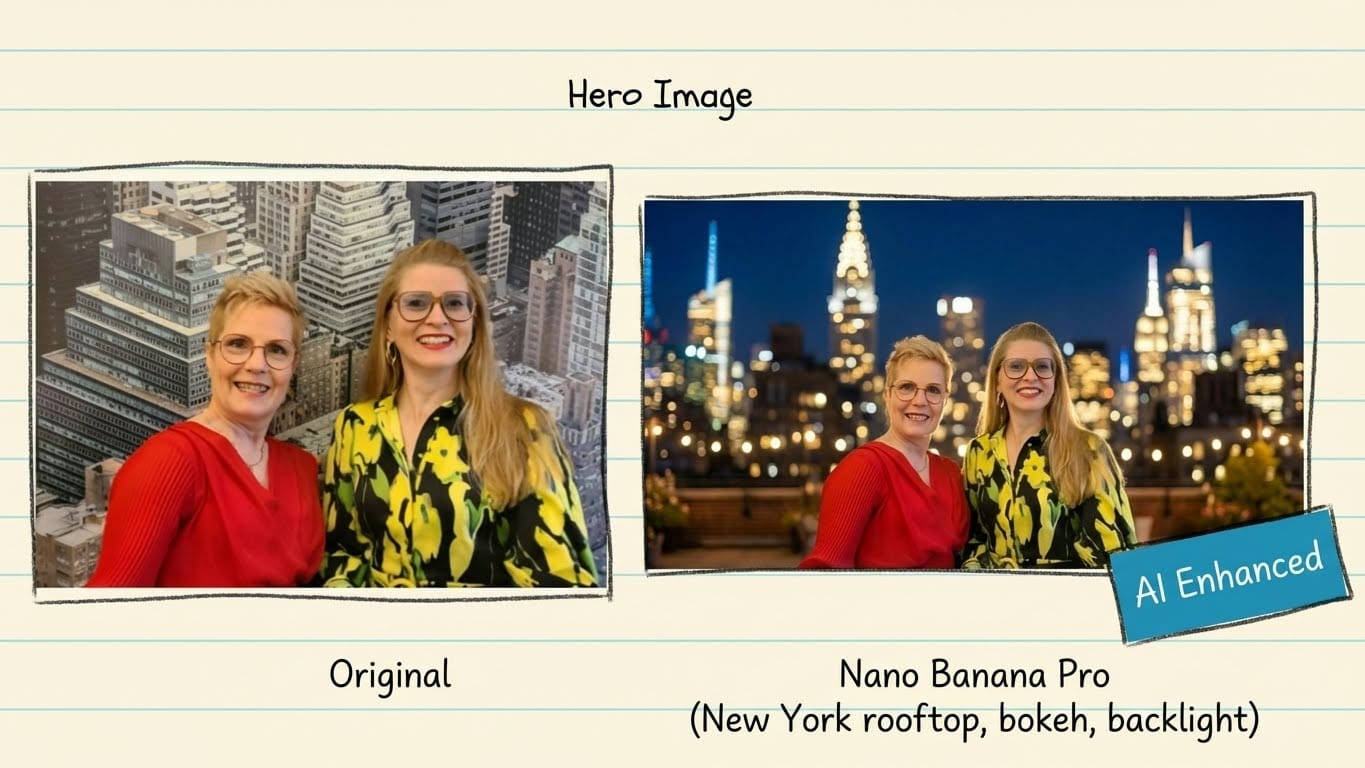
One challenge: Nano Banana Pro blocks prompts it thinks involve prominent people. Since both vocalists have an online presence, I had to work around this for the hero image.
Step 2: Asset Extraction
From the mockups and reference images, I identified what I needed:
- 7 image assets (hero photo, corner ornaments, dividers, pattern tiles, footer photo, og-image)
- 4 Google Fonts (Playfair Display, Inter, Bebas Neue, Poiret One)
- Color palette (gold #D4AF37, burgundy #722F37, cream #FFF8E7, charcoal #2D2D2D)
Some assets came from Canva, others extracted directly from the AI mockups.
Step 3: Development
Using Claude Code in VS Code, I built the site through conversation. I described what I wanted, reviewed the output, took screenshots of issues, and iterated.
One feature that previously required significant effort - a German/English language toggle - was straightforward to implement. I described the behavior I wanted and it worked.
Step 4: Review and Refinement
My wife reviewed the site and provided feedback. This led to consolidating sections (the original 7 sections became 5) and removing a song list that felt redundant.
She wasn't entirely satisfied with some aspects - Google Fonts are limited for achieving an authentic 1930s Art Deco style, and the hero image could be improved. Real user feedback, even critical feedback, improves the final product.
Step 5: Deployment and SEO
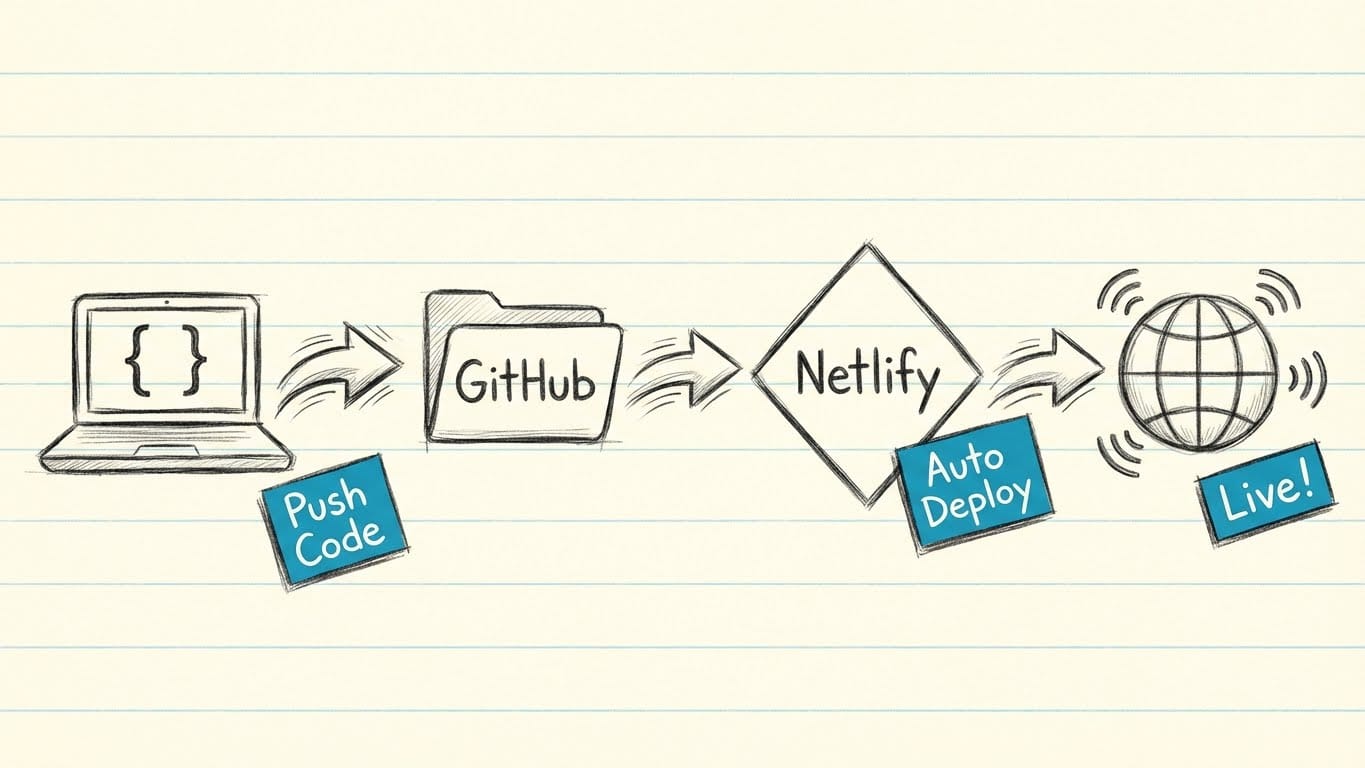
- Pushed to GitHub repository
- Connected to Netlify for automatic deployment
- Added structured data (5 individual MusicEvent schemas for each concert)
- Implemented UTM tracking on all external links
- Added newsletter signup integration
How Do I Avoid Mistakes When Using AI to Code?
These three habits saved me time:
Keep a scratchpad. I maintain a scratchpad.md file and regularly tell Claude Code to update it with current tasks and decisions. When you return to a project after a break, you can say "review the scratchpad" and pick up where you left off.
Preview before deploying. Netlify's free tier has limited deploy credits - each push to GitHub uses one. Open your HTML file in a browser locally before pushing. Tell Claude Code "don't deploy just yet" while you're still iterating.
Ask when you don't know. If you don't know how to do something - set up GitHub, connect Netlify, preview locally - just ask Claude Code. It can walk you through the setup.
Should I Use WordPress or Static HTML for a Small Website?
This approach produces a static HTML site - no database, no backend admin panel.
Advantages of static HTML:
- Fast load times (no server-side processing)
- Netlify's CDN caches the site globally
- Free hosting for simple projects
- No security vulnerabilities from CMS plugins
Disadvantages:
- No admin panel - you edit code directly
- Requires some familiarity with development workflows
- Changes need a developer (or AI) rather than a content editor
My recommendation: For a 1-5 page promotional site, the trade-offs favor static HTML. For a large blog or frequently updated content, a CMS might still make sense.
What Free Tools Should I Use to Build a Professional Static Site?
After shipping, I did a deep dive into best practices. Here are the tools I'm adding to my next project:
Better AI Instructions
1. FlyonUI - Use a component library instead of raw Tailwind. Pre-built buttons, cards, and navigation produce cleaner code. The AI makes fewer mistakes with semantic class names like btn btn-primary instead of long utility strings.
2. HTML5 Boilerplate - Start with a real boilerplate instead of an empty folder. It includes security headers, proper meta tags, and cross-browser fixes.
Systematic Workflow
3. Commit after every working piece. Not just at the end. If the AI breaks something, git checkout gets you back to the last working version in seconds.
4. Track time by category. Log mockups, coding, debugging, and deployment separately. My "8 hours" felt fast, but I don't know how much was fixing AI mistakes versus productive work.
Automated Quality Checks (All Free)
5. Pa11y - Scans HTML for accessibility issues. Catches missing alt text, heading order problems, and contrast issues before launch.
6. Hyperlink - Finds broken links. Point it at your HTML files and it checks every link.
7. Schema Markup Validator - Paste your structured data and it tells you if Google will understand it.
8. Lighthouse CI - Google's performance auditor, automated. Checks performance, accessibility, and SEO on every deploy.
What Are Claude Code's Best Features for Web Development?
Beyond basic prompting, Claude Code has power features that dramatically improve output quality.
Plan Mode
Press Shift+Tab twice before any significant change. Claude shows you exactly what it plans to do before doing it. This alone would have saved me hours of fixing unintended edits.
Slash Commands
Create reusable checklists as markdown files. Put this file at .claude/commands/deploy-check.md:
Before deploying, verify:

1. Run Pa11y accessibility check on index.html
2. Run Hyperlink to find broken links
3. Validate structured data at validator.schema.org
4. Check that all external links have rel="noopener"
5. Test language toggle (if bilingual)
6. Preview on mobile (375px width)
7. Check Lighthouse score (aim for 90+)

Only proceed with deployment after confirming all checks pass.
Then run it anytime with: /project:deploy-check
Hooks
Add automatic checks that run every time Claude edits a file. Put this in .claude/settings.json:
Auto-check for missing translations:
{
  "hooks": {
    "PostToolUse": [
      {
        "matcher": "Edit|Write",
        "hooks": [
          {
            "type": "command",
            "command": "de=$(grep -c 'content-de' \"$file_path\" 2>/dev/null || echo 0); en=$(grep -c 'content-en' \"$file_path\" 2>/dev/null || echo 0); if [ \"$de\" != \"$en\" ] && [ \"$de\" != \"0\" ]; then echo '⚠️ Translation mismatch: '$de' German, '$en' English sections'; fi"
          }
        ]
      }
    ]
  }
}
Check external links for security:
{
  "hooks": {
    "PostToolUse": [
      {
        "matcher": "Edit|Write",
        "hooks": [
          {
            "type": "command",
            "command": "if grep -q 'target=\"_blank\"' \"$file_path\" 2>/dev/null; then if grep 'target=\"_blank\"' \"$file_path\" | grep -v 'noopener' > /dev/null; then echo '⚠️ External link missing rel=\"noopener\"'; fi; fi"
          }
        ]
      }
    ]
  }
}
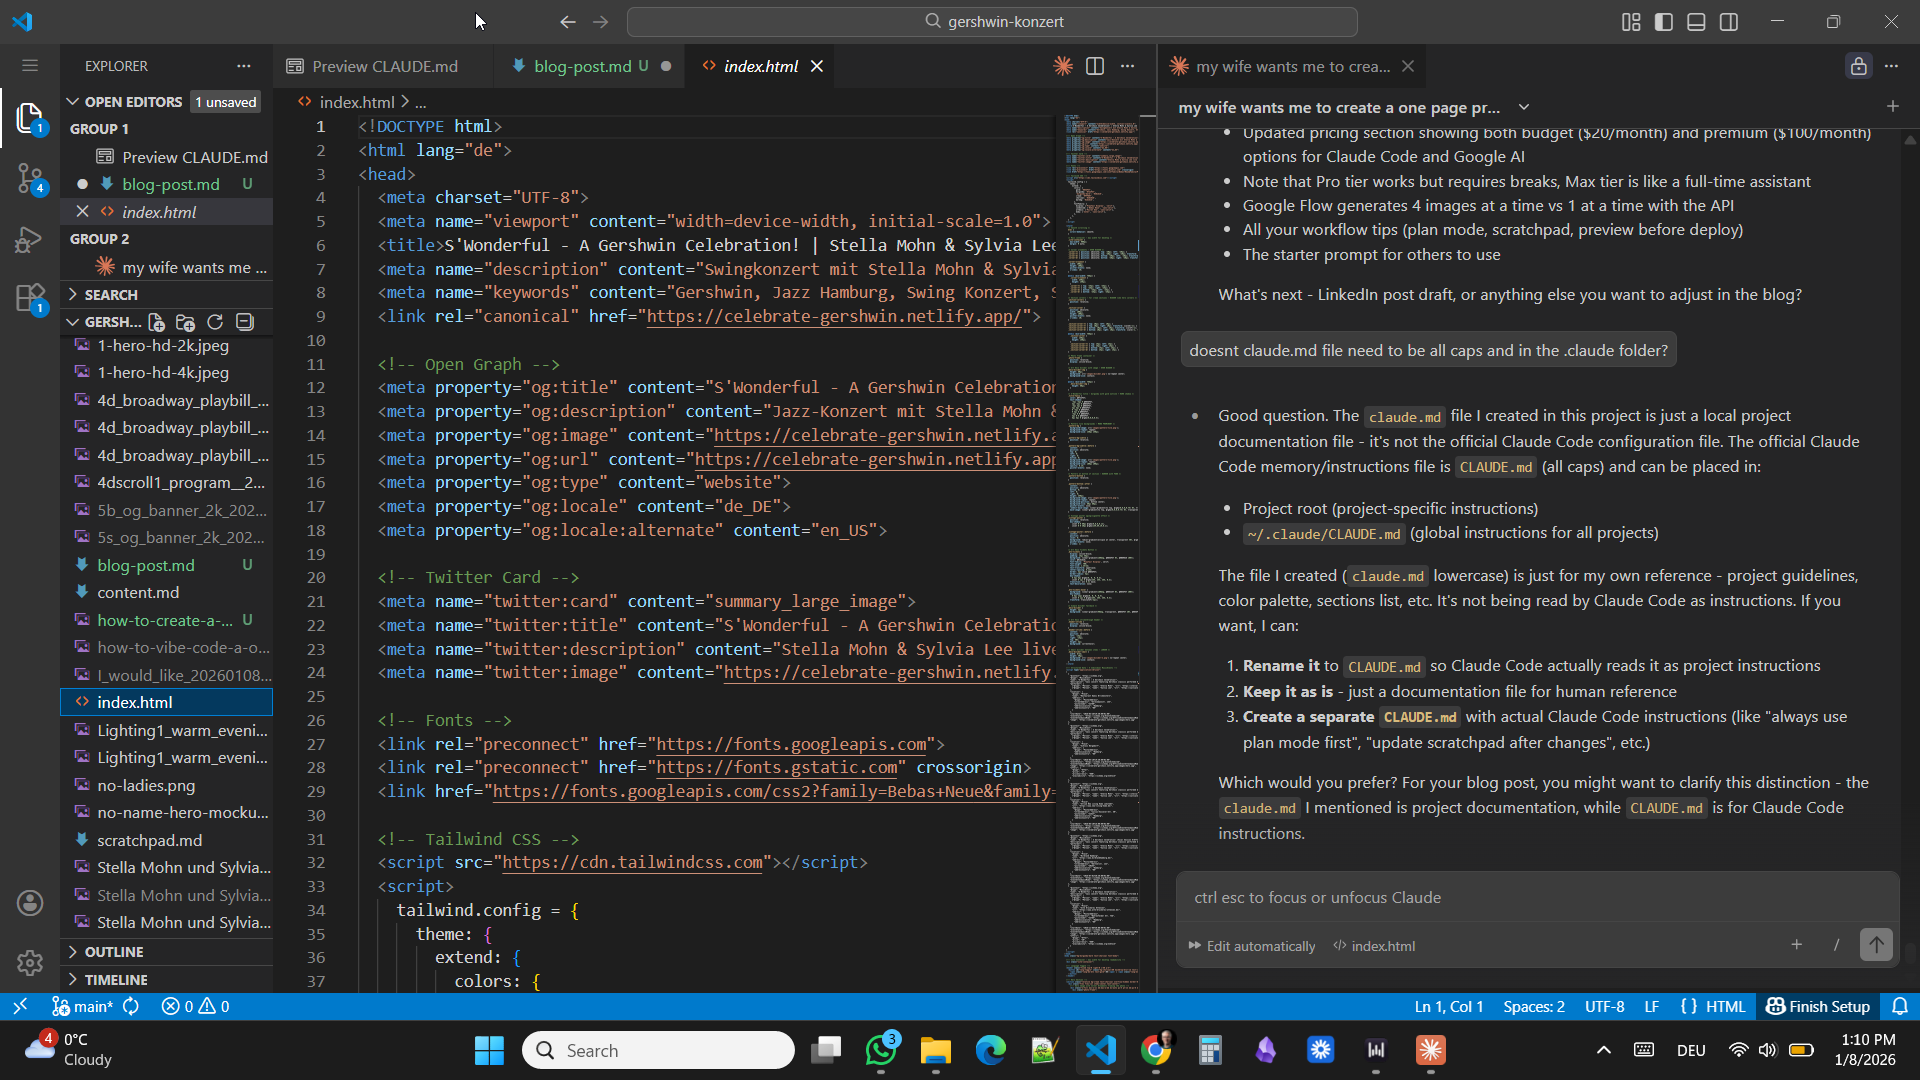
How Do I Set Up a CLAUDE.md File for My Project?
Copy this template to .claude/CLAUDE.md and fill in the bracketed sections:
# Project: [Your Project Name]

[One sentence describing what this site is for.]

## Tech Stack
- HTML5 (semantic markup)
- FlyonUI components via CDN (cleaner than raw Tailwind)
- Vanilla JavaScript (only where needed)
- Hosting: [Netlify / Vercel / GitHub Pages]

## CDN Links (copy to your HTML)
<!-- In <head> -->
<link href="https://cdn.flyonui.com/flyonui@latest/flyonui.min.css" rel="stylesheet">
<script src="https://cdn.tailwindcss.com"></script>

<!-- Before </body> -->
<script src="https://cdn.flyonui.com/flyonui@latest/flyonui.min.js"></script>

## Design Tokens
- Style: [Modern / Minimal / Vintage / etc.]
- Primary color: [#hexcode]
- Secondary color: [#hexcode]
- Background: [#hexcode]
- Text: [#hexcode]
- Headings font: [Font name from Google Fonts]
- Body font: [Font name or "system sans-serif"]

## Page Sections
1. [Section name] - [what it contains]
2. [Section name] - [what it contains]
3. [etc.]

## Component Preferences
Use FlyonUI semantic classes:
- `btn btn-primary` instead of long Tailwind utility strings
- `card` with `card-body` for content blocks
- `navbar` for navigation
- See full list: https://flyonui.com/docs

## Rules
- Mobile-first (test at 375px width)
- All external links need: target="_blank" rel="noopener"
- Commit after each working section
- Use Plan Mode (Shift+Tab twice) before multi-file changes

## Structured Data
- Schema type needed: [LocalBusiness / Event / Product / Article / none]
- Validate at: https://validator.schema.org

## Pre-Launch Checklist
- [ ] Accessibility scan passes (Pa11y)
- [ ] No broken links (Hyperlink)
- [ ] Structured data validates
- [ ] Lighthouse score 90+
- [ ] Tested on actual phone, not just DevTools
The difference between hobbyist and professional: Professionals use the same AI tools, but they validate the output before shipping. These free tools are the quality gates that separate "it works on my screen" from "it's ready for a client."